To truly make your Ghost blog stand out and reflect your unique style or brand, you may need to customize the theme your using. In this article, I'll guide you through the process of editing a Ghost theme, introduce the necessary tools, and show you how to upload the customized theme to your Ghost blog.
Step 1: Getting Acquainted with Theme Files
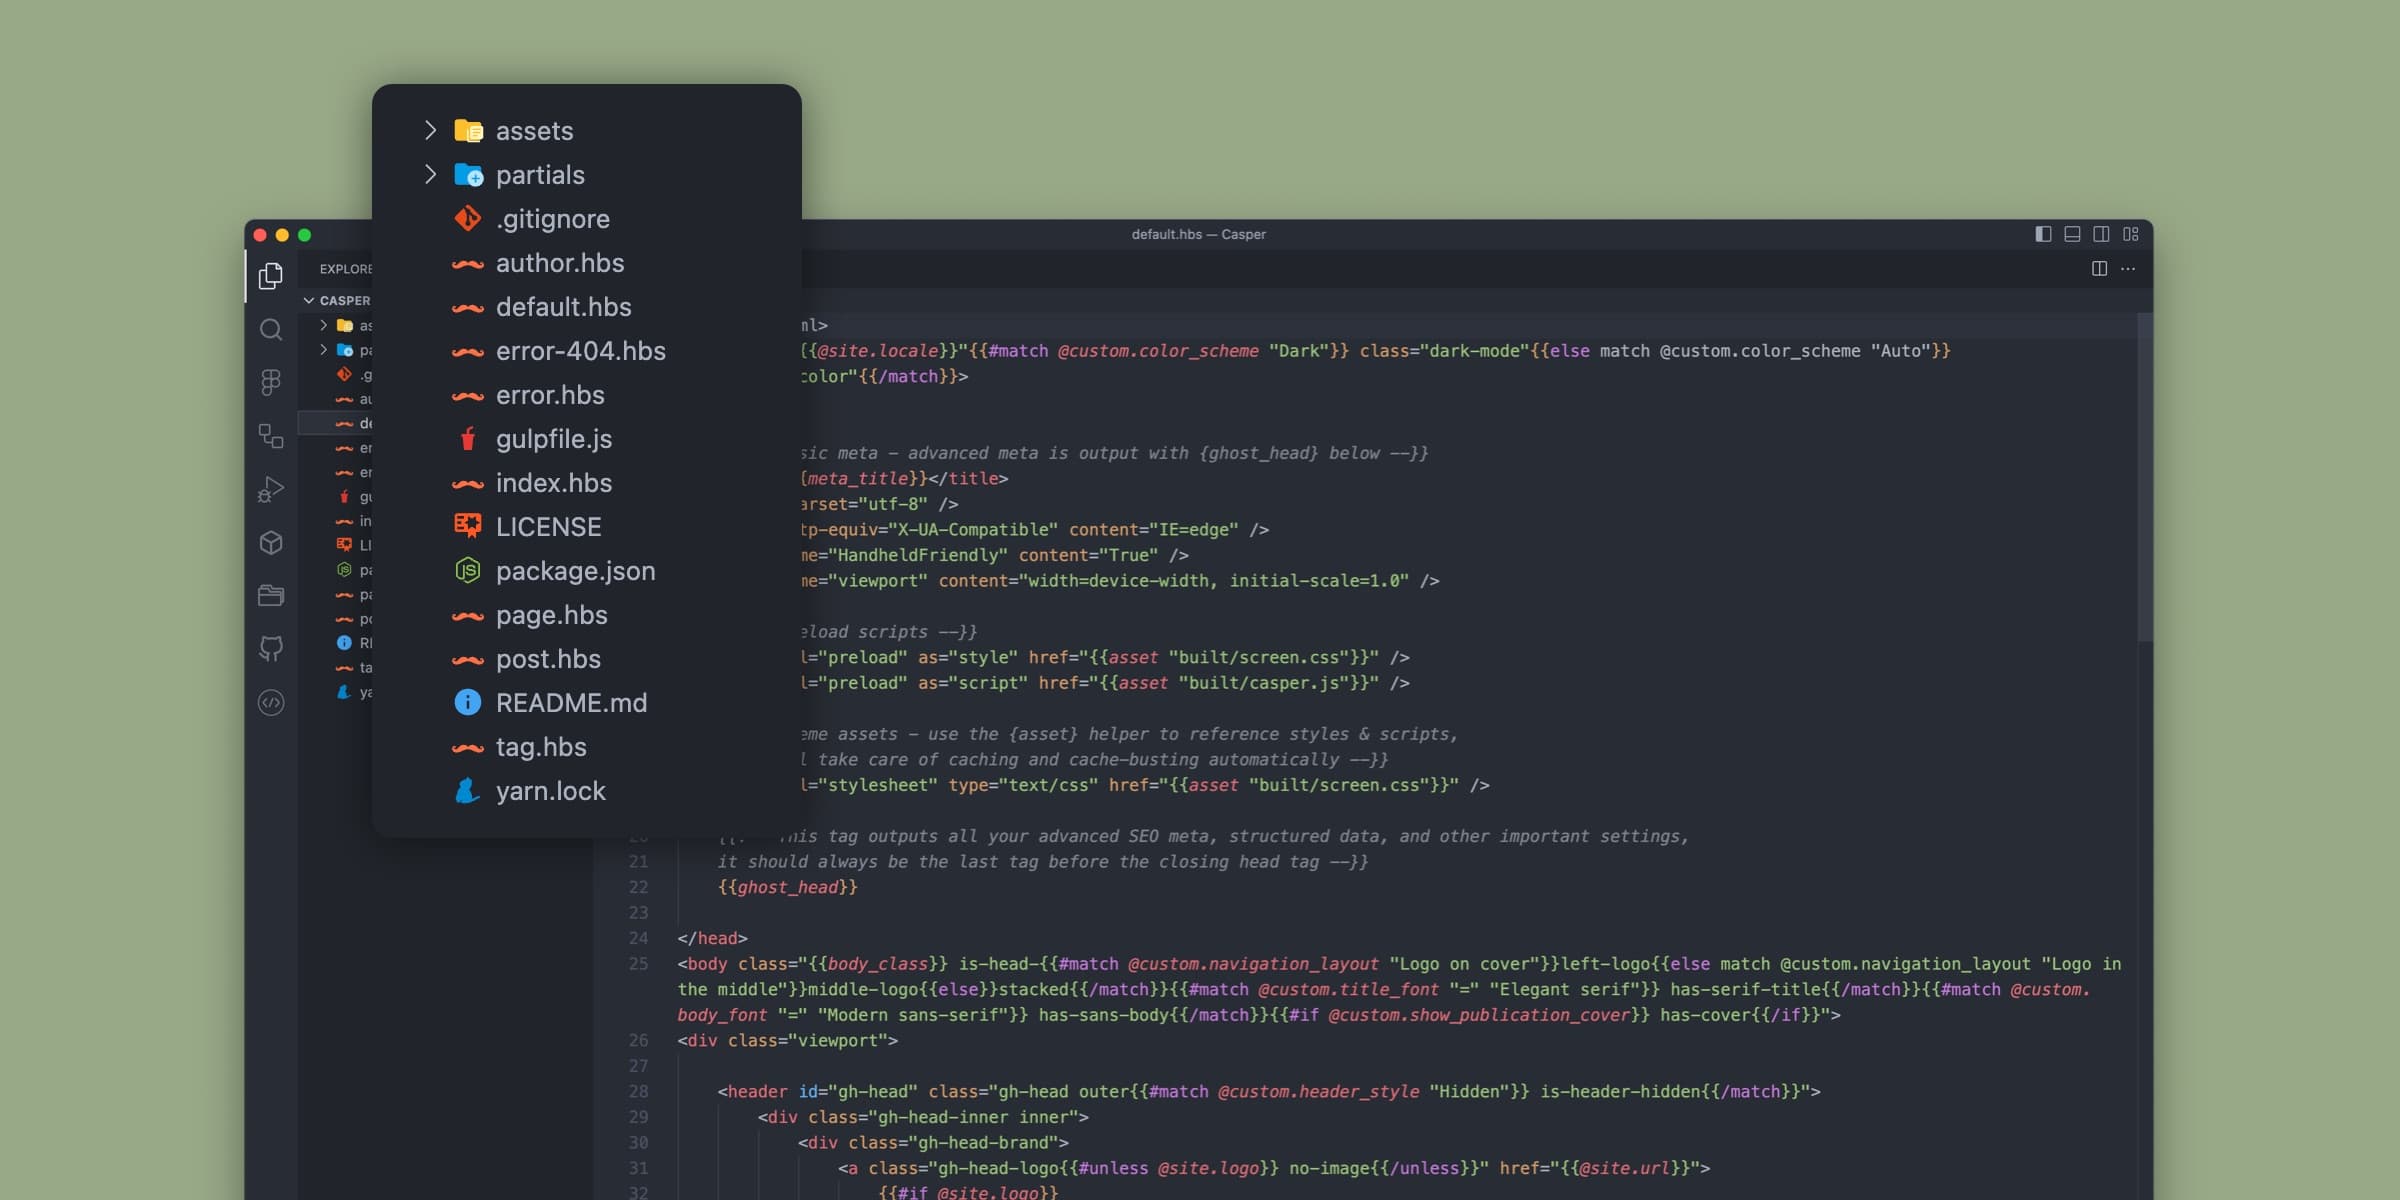
Before delving into customizing a theme, familiarize yourself with the Ghost theme file structure. A standard Ghost theme contains several required files:
-
default.hbs: The layout template file responsible for rendering your website’s content. -
post.hbs: The template used for individual blog posts. -
page.hbs: Similar topost.hbs, this file dictates the layout of pages like About or Contact. -
partials: Contains reusable components, such as headers, footers, and sidebars, applied across the theme. -
assets: A folder containing CSS, JavaScript, and other assets used in the theme.
Step 2: Essential Tools for Editing
To efficiently edit your Ghost theme files, you’ll need the following tools:
- Text Editor: While any text editor suffices, utilizing a code-focused editor like Visual Studio Code, or Sublime Text will significantly enhance your editing experience.
- Local Development Environment: Set up a local development environment with Node.js and the Ghost-CLI to preview theme changes before making them live. For more on installing Ghost locally, check out the official guide below:
Step 3: Customizing Your Theme
Now, let’s dive into the process of customizing your Ghost theme. Here’s a comprehensive step-by-step guide:
-
Locate the Theme Directory: Access your Ghost theme files by navigating to the
content/themesdirectory of your Ghost installation. - Make a Backup: Before initiating any changes, create a complete backup of your current theme. Copy the entire theme folder and add “-backup.” to the folder name.
- Edit Theme Files: Open your preferred text editor and unleash your creativity by modifying the theme files. Experiment with colors, fonts, layouts, and include or remove elements as per your vision. Take advantage of the various helpers, which Ghost themes utilize, to create dynamic sections.
- Preview Changes Locally: Employ a local development environment (from step 2) to preview changes locally without affecting your live site. This preview stage is instrumental in identifying any potential issues.
- Debugging and Testing: During the customization process, rigorously test your theme across various devices and screen sizes to ensure seamless user experience. The browser developer tools will be your ally in identifying and rectifying any bugs or glitches.
Step 4: Zipping the Theme and Uploading
Once you are content with your theme’s customization, it’s time to package and upload it to your Ghost website.
- Compress the Theme: Select all the files and folders in your customized theme directory, right-click, and choose “Compress” or “Zip” to create a zip file of your theme.
-
Log in to Ghost Admin: Access your Ghost Admin dashboard by visiting your website’s URL followed by
/ghost. - Navigate to “Settings”: Within the Ghost Admin dashboard, locate and click on “Settings” in the left-hand sidebar.
- Choose “Design”: Under the “Settings” section, select the “Design” tab to access the theme settings.
- Upload the Theme: Look for the “Upload a theme” button and select the zip file you created earlier. Ghost will handle the automatic upload and application of your customized theme to your website.
- Activate the Theme: After successful uploading, click on the “Activate” button to set your customized theme live on your Ghost website.
Also checkout our guide for using Ghost with GitHub for automating and streamlining your deployments.
Wrapping Up
By following the steps outlined in this guide, you can confidently edit your Ghost theme files, efficiently use the necessary tools, and effortlessly upload your customized theme to your Ghost website.
But if that’s a bit too much for you to tackle on your own, we’re here to help! Check out our Ghost services below or reach out to us anytime.

Eric Alli @ericalli
Eric is the founder of LayeredCraft. He has worked as a designer and engineer for 15+ years and loves creating innovative and effective themes for all industries.