Adding Social Sharing buttons to Ghost isn't always straightforward. Using AddThis, an awesome free set of website tools, you can display social sharing buttons for virtually all social networks in less than 5 minutes.
AddThis offers free website tools including social share buttons, list builders, link promotion, and recommended posts, all for free! In this post we’ll walk through setting up social share buttons to your Ghost blog.
By default Ghost supports Twitter and Facebook sharing out of the box, but it can be tricky to add additional social sharing buttons. Using AddThis and their social sharing buttons tool, you can add a virtually unlimited amount of sharing buttons to your blog without modifying any code and customize it to fit your design. Let’s get started!
Step 1: Sign Up
Head over to AddThis and signup for a free account.
Step 2: Add A New Tool
Click on the Tools option from the navigation bar.
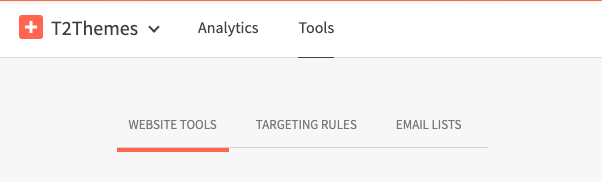
Then select the + Add New Tool button.
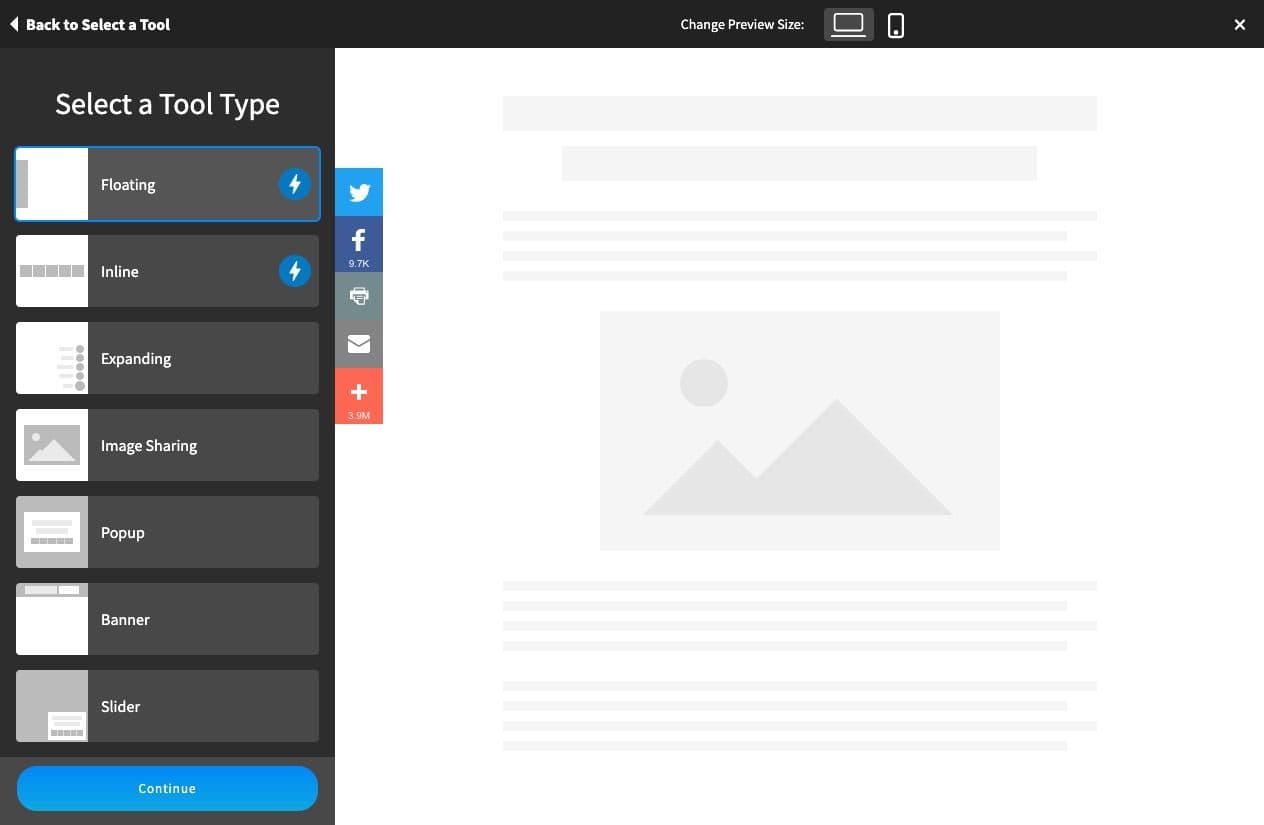
Step 3: Choose a Layout
Select the type of social sharing buttons you’d like to use. There are 7 different options to choose from:
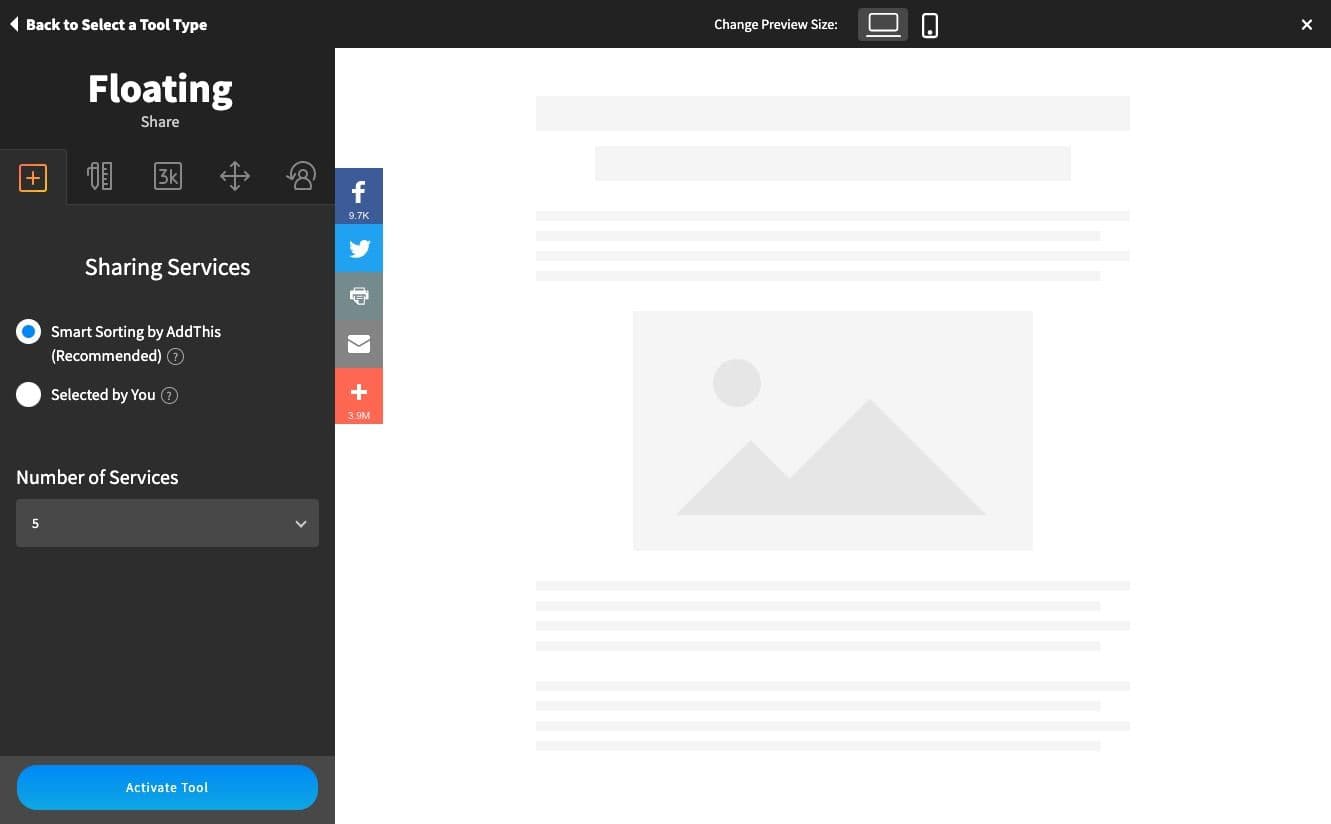
Step 4: Configure Sharing Services
Now you can choose the specific social sharing sites to display on your blog. You can have AddThis show recommended sites or fine tune the list of social sites by using the Selected by You option.
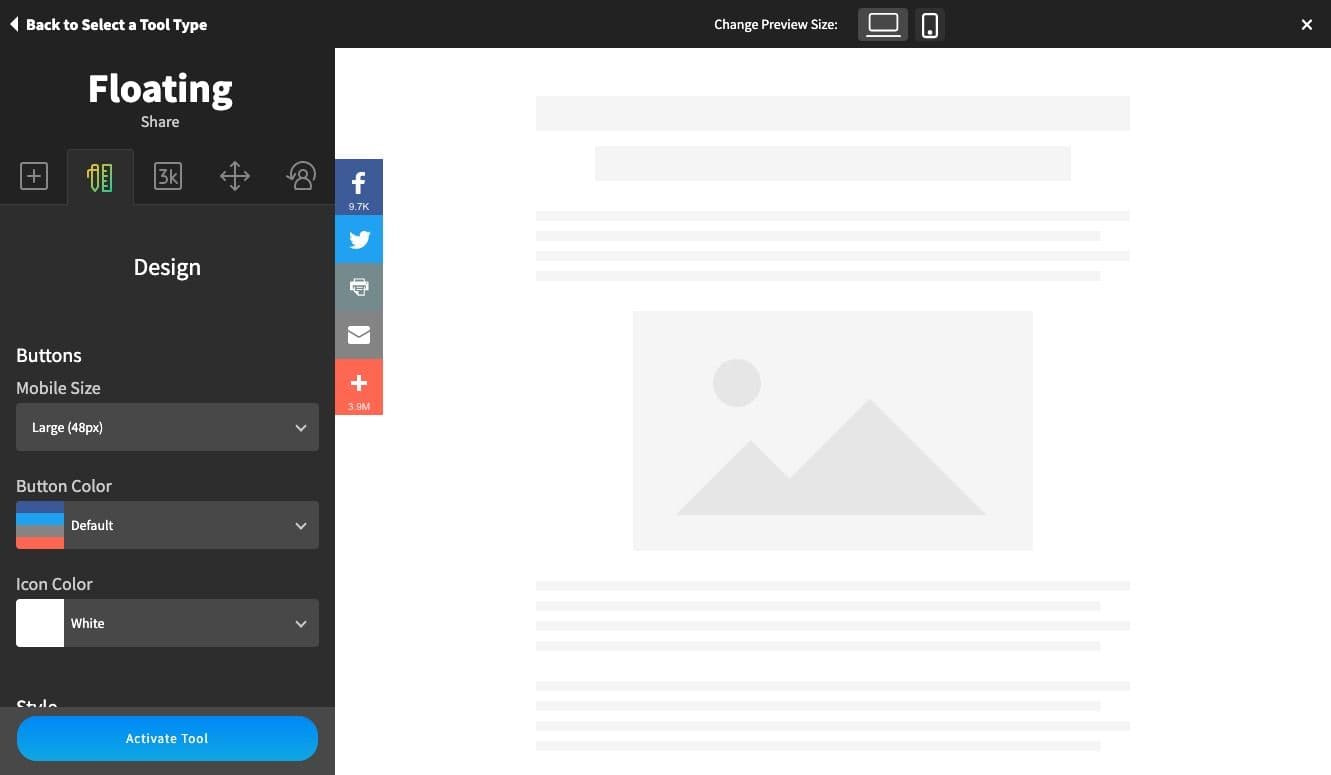
Step 5: Customize the Design
Next, AddThis gives you several controls for customizing the design of your social sharing buttons including colors, labels, and responsive layout options for mobile.
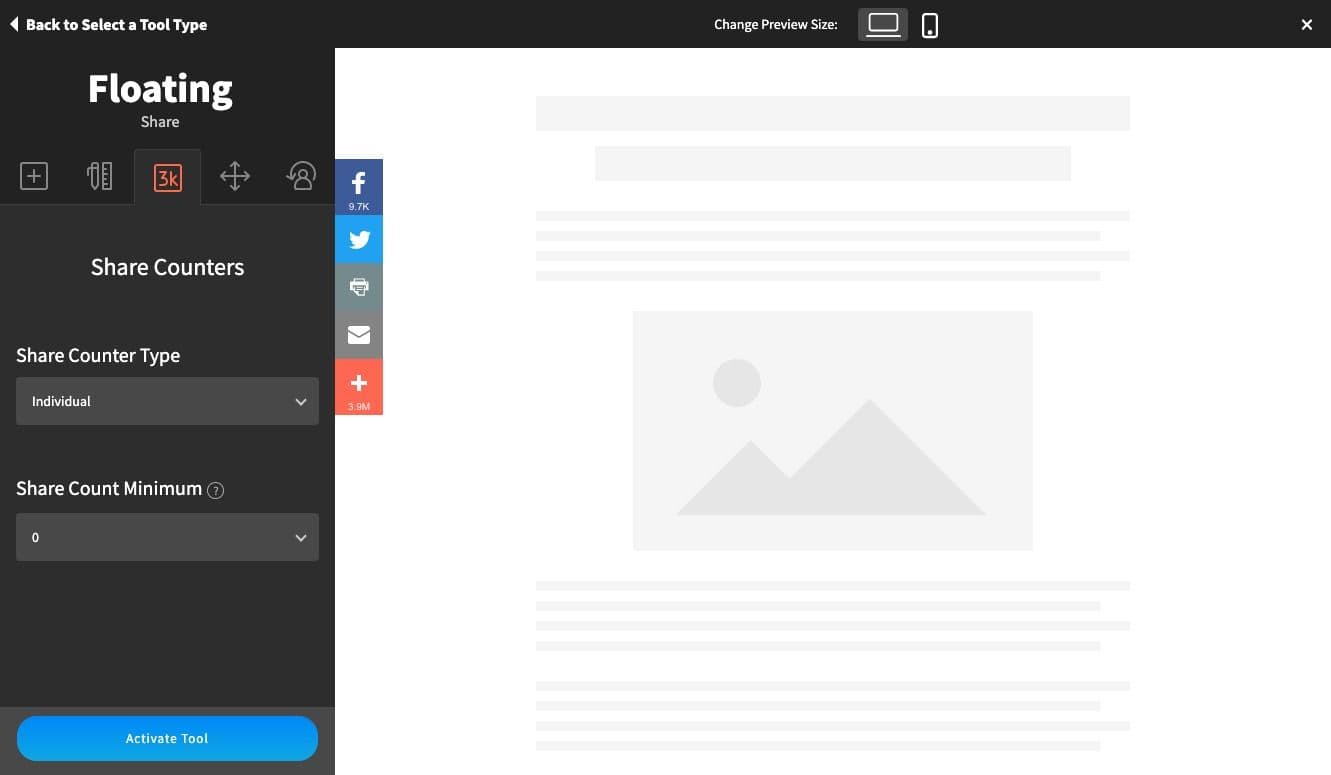
Step 6: Displaying Share Counters
Share counters let your visitors now how many times an article has been shared on each of the social sharing sites. You can choose from a few options to customize how these numbers appear, or disable them entirely.
Step 7: Configure Display Behavior
The last option allows you to configure exactly where the social sharing buttons appear. For example, you may want to disable it on your homepage or certain pages on your blog or only display on post pages. You can do that easily here.

Step 8: Activate!
Once you’re finished configuring your settings, click the Activate Tool button to save and continue. Next, you’ll see a page with a code snippet that you’ll need to integrate into your blog. This is a simple two step process.
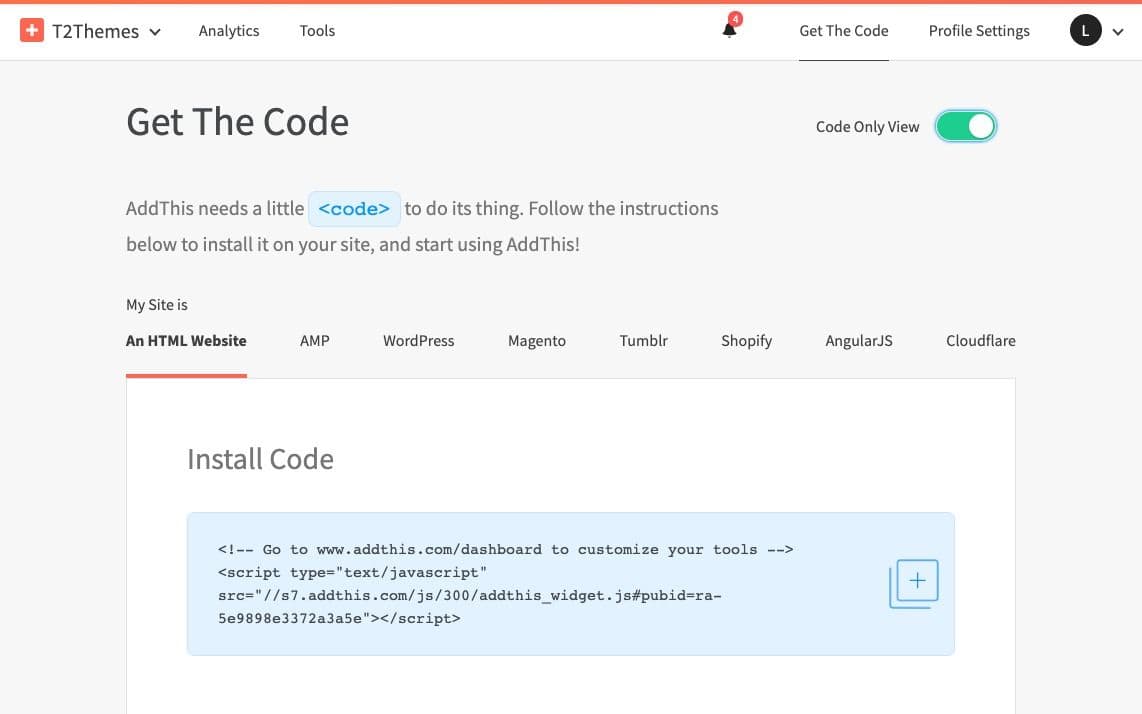
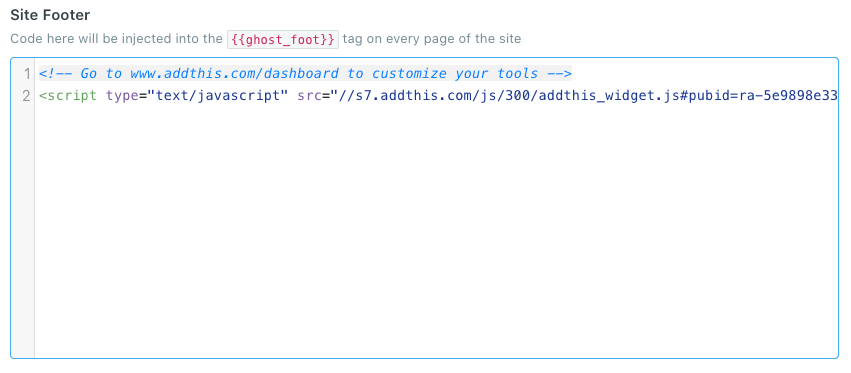
- Copy the code snippet from the Install Code box
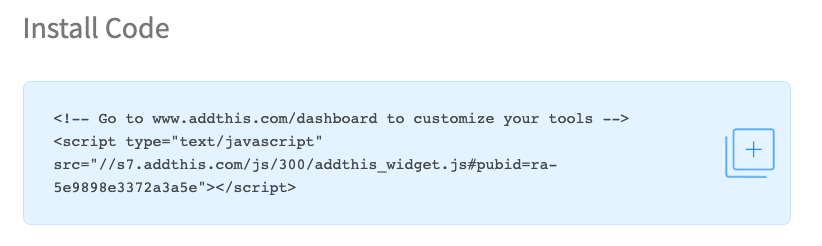
- Navigate to your Ghost Admin Panel > Code Injection and paste the above code snippet into the Site Footer area:
That’s all! Visit your blog and you should now see social sharing options:

If you have and questions or if you’ve successfully setup AddThis with your Ghost blog, we’d love to hear about it! Tweet us @layeredcraft!

Eric Alli @ericalli
Eric is the founder of LayeredCraft. He has worked as a designer and engineer for 15+ years and loves creating innovative and effective themes for all industries.